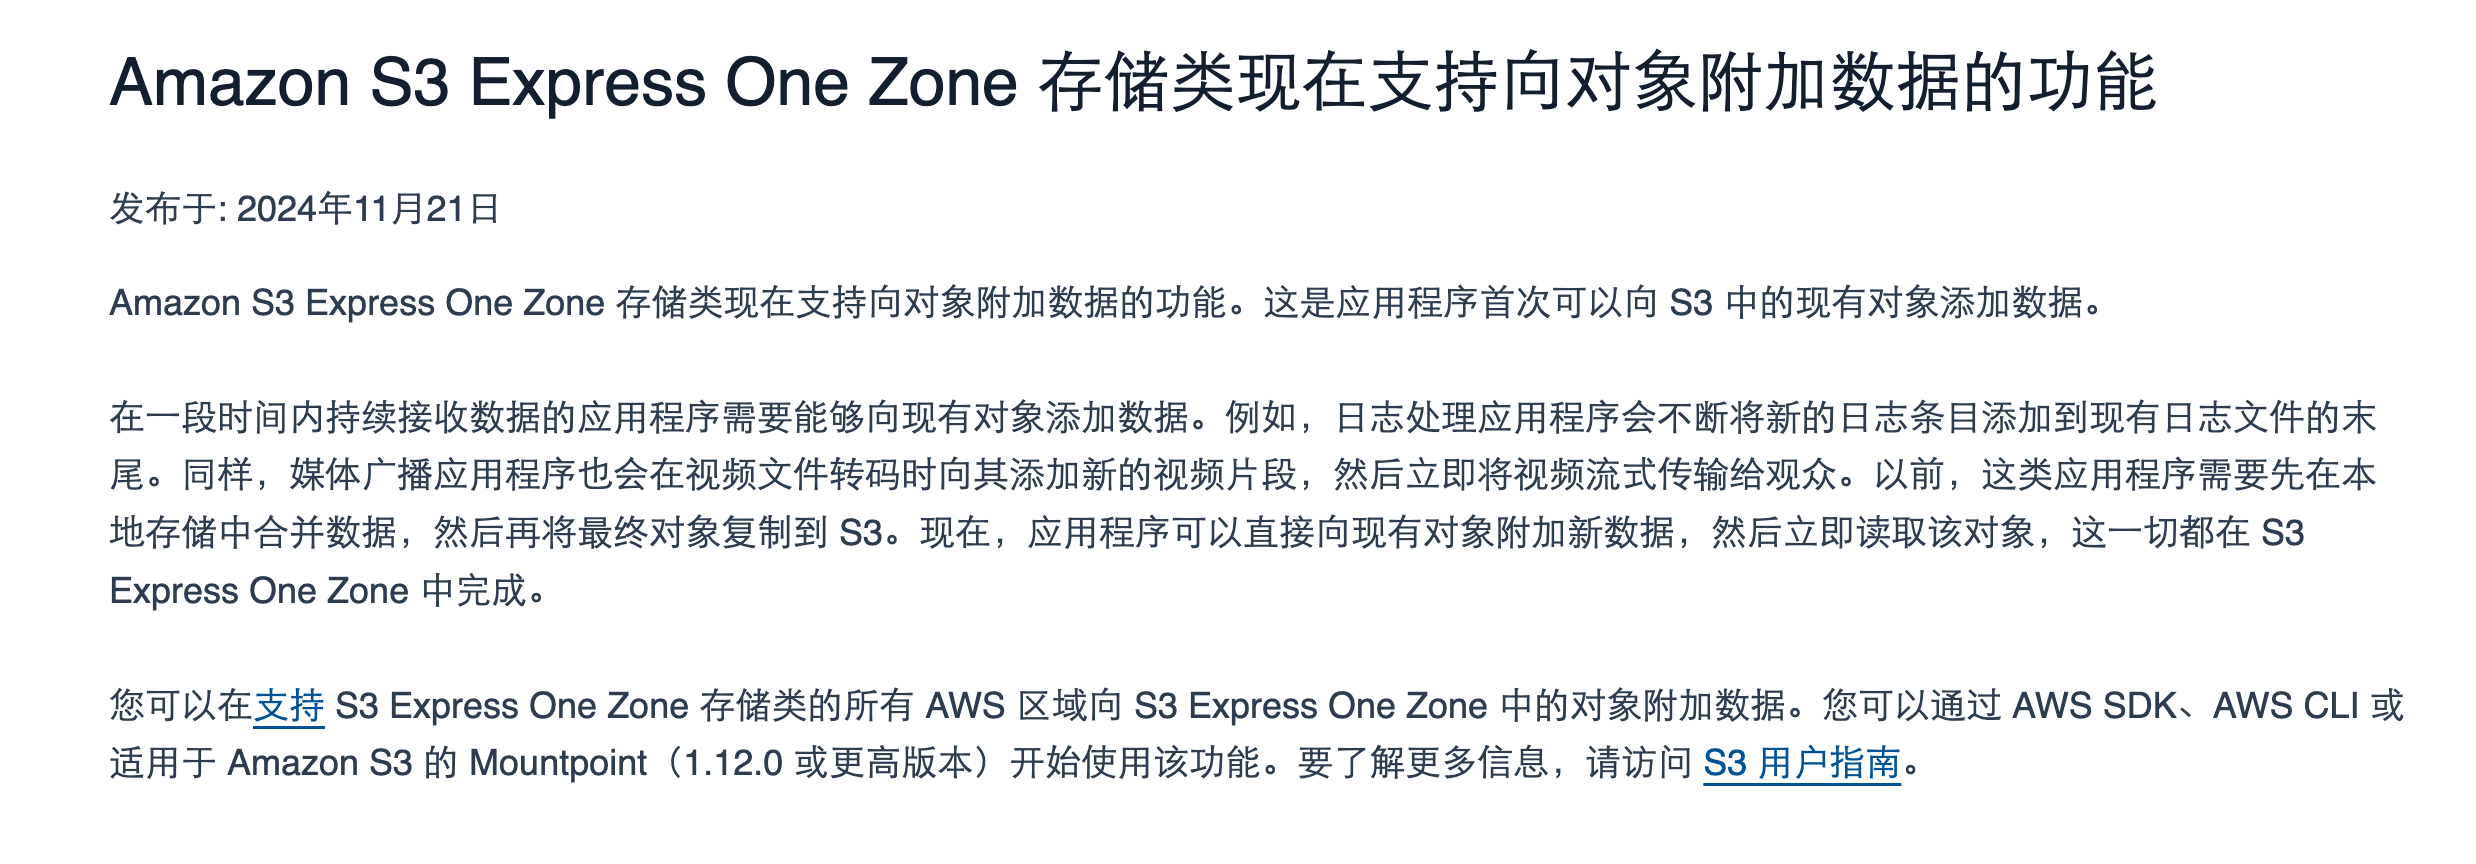
背景 aws的s3以前是不支持追加写这个功能的
这个存储类型大概是2023年发布的,这个文章是2024年11月21日发布的
找到功能的发布大概时间 我们看下boto3的工具是什么时候集成进去的就知道这个功能发布的大概的时间
aws里面使用这个参数去控制追加写的偏移量的,我们根据这个关键字去找
找到botcore的代码,使用git下载下来
1 cd botocore/botocore/data/s3/2006-03-01
进入到这个目录,这个目录里面是aws的s3的接口文档,也就是不管是用python的sdk还是使用aws进行操作的时候,命令行的一些接口都是通过这个目录里面的json文件去判断的
找到这个文件的所有的历史提交
1 git log -p service-2.json
找到了这个地方的提交代码
1
2
3
4
5
6
7
8
9
10
@@ -9579,6 +9667,12 @@"location" :"uri" ,"locationName" :"Key" "WriteOffsetBytes" :{"shape" :"WriteOffsetBytes" ,"documentation" :"<p> Specifies the offset for appending data to existing objects in bytes. The offset must be equal to the size of the existing object being appended to. If no object exists, setting this header to 0 will create a new object. </p> <note> <p>This functionality is only supported for objects in the Amazon S3 Express One Zone storage class in directory buckets.</p> </note>" ,"location" :"header" ,"locationName" :"x-amz-write-offset-bytes"
找到5c8efd314eee44949f6a9e1fb8af522c654ded15这个提交
1
2
3
4
5
commit 5c8efd314eee44949f6a9e1fb8af522c654ded15
因为这个模型的提交很频繁,所以这个提交里面也不会单独说明这个功能
查看这次提交
1 git show 5c8efd314eee44949f6a9e1fb8af522c654ded15 service-2.json
确认就是这个提交里面增加的
也就是上面的2024年的11月21日,跟上面的发布时间基本对上了,也就是那边发布了接口文档,这边适配几个关键字就可以使用相关的功能了,这个松耦合做的非常好
ceph这边的适配 我们看下官方文档
1 https://docs.ceph.com/en/reef/radosgw/s3/objectops/
返回的关键字是
1 x-rgw-next-append-position
那我们查询这个关键字就知道什么时候合入的这个功能的
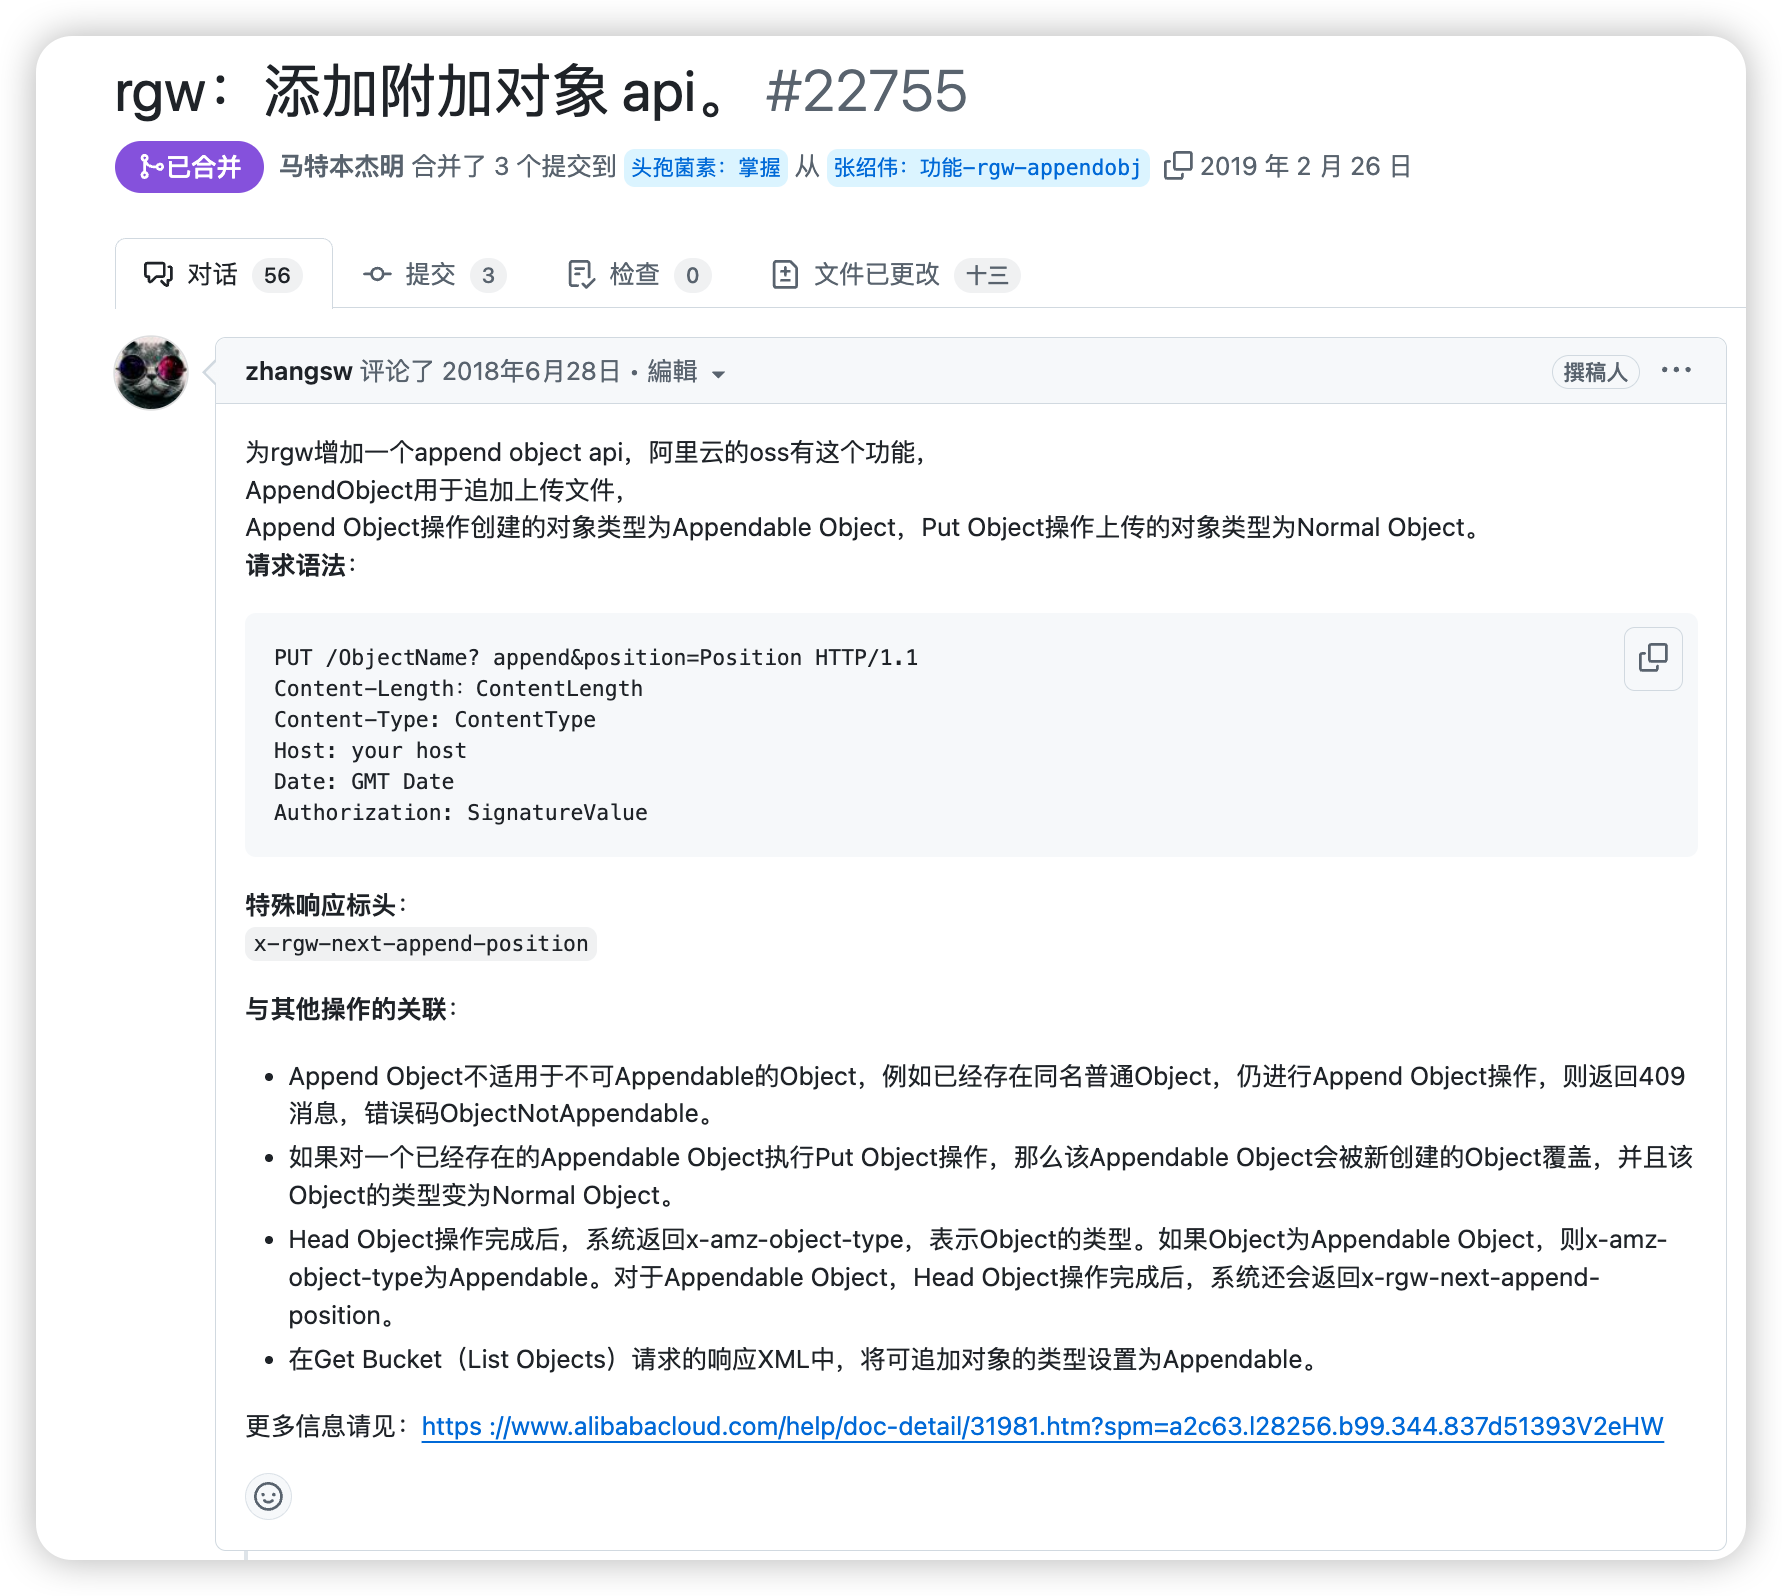
最开始在2018年就提出来了,这个是阿里云的oss支持这个功能,然后ceph这边做了适配,这个地方从时间线上面aws官方这个发布的时间有点晚
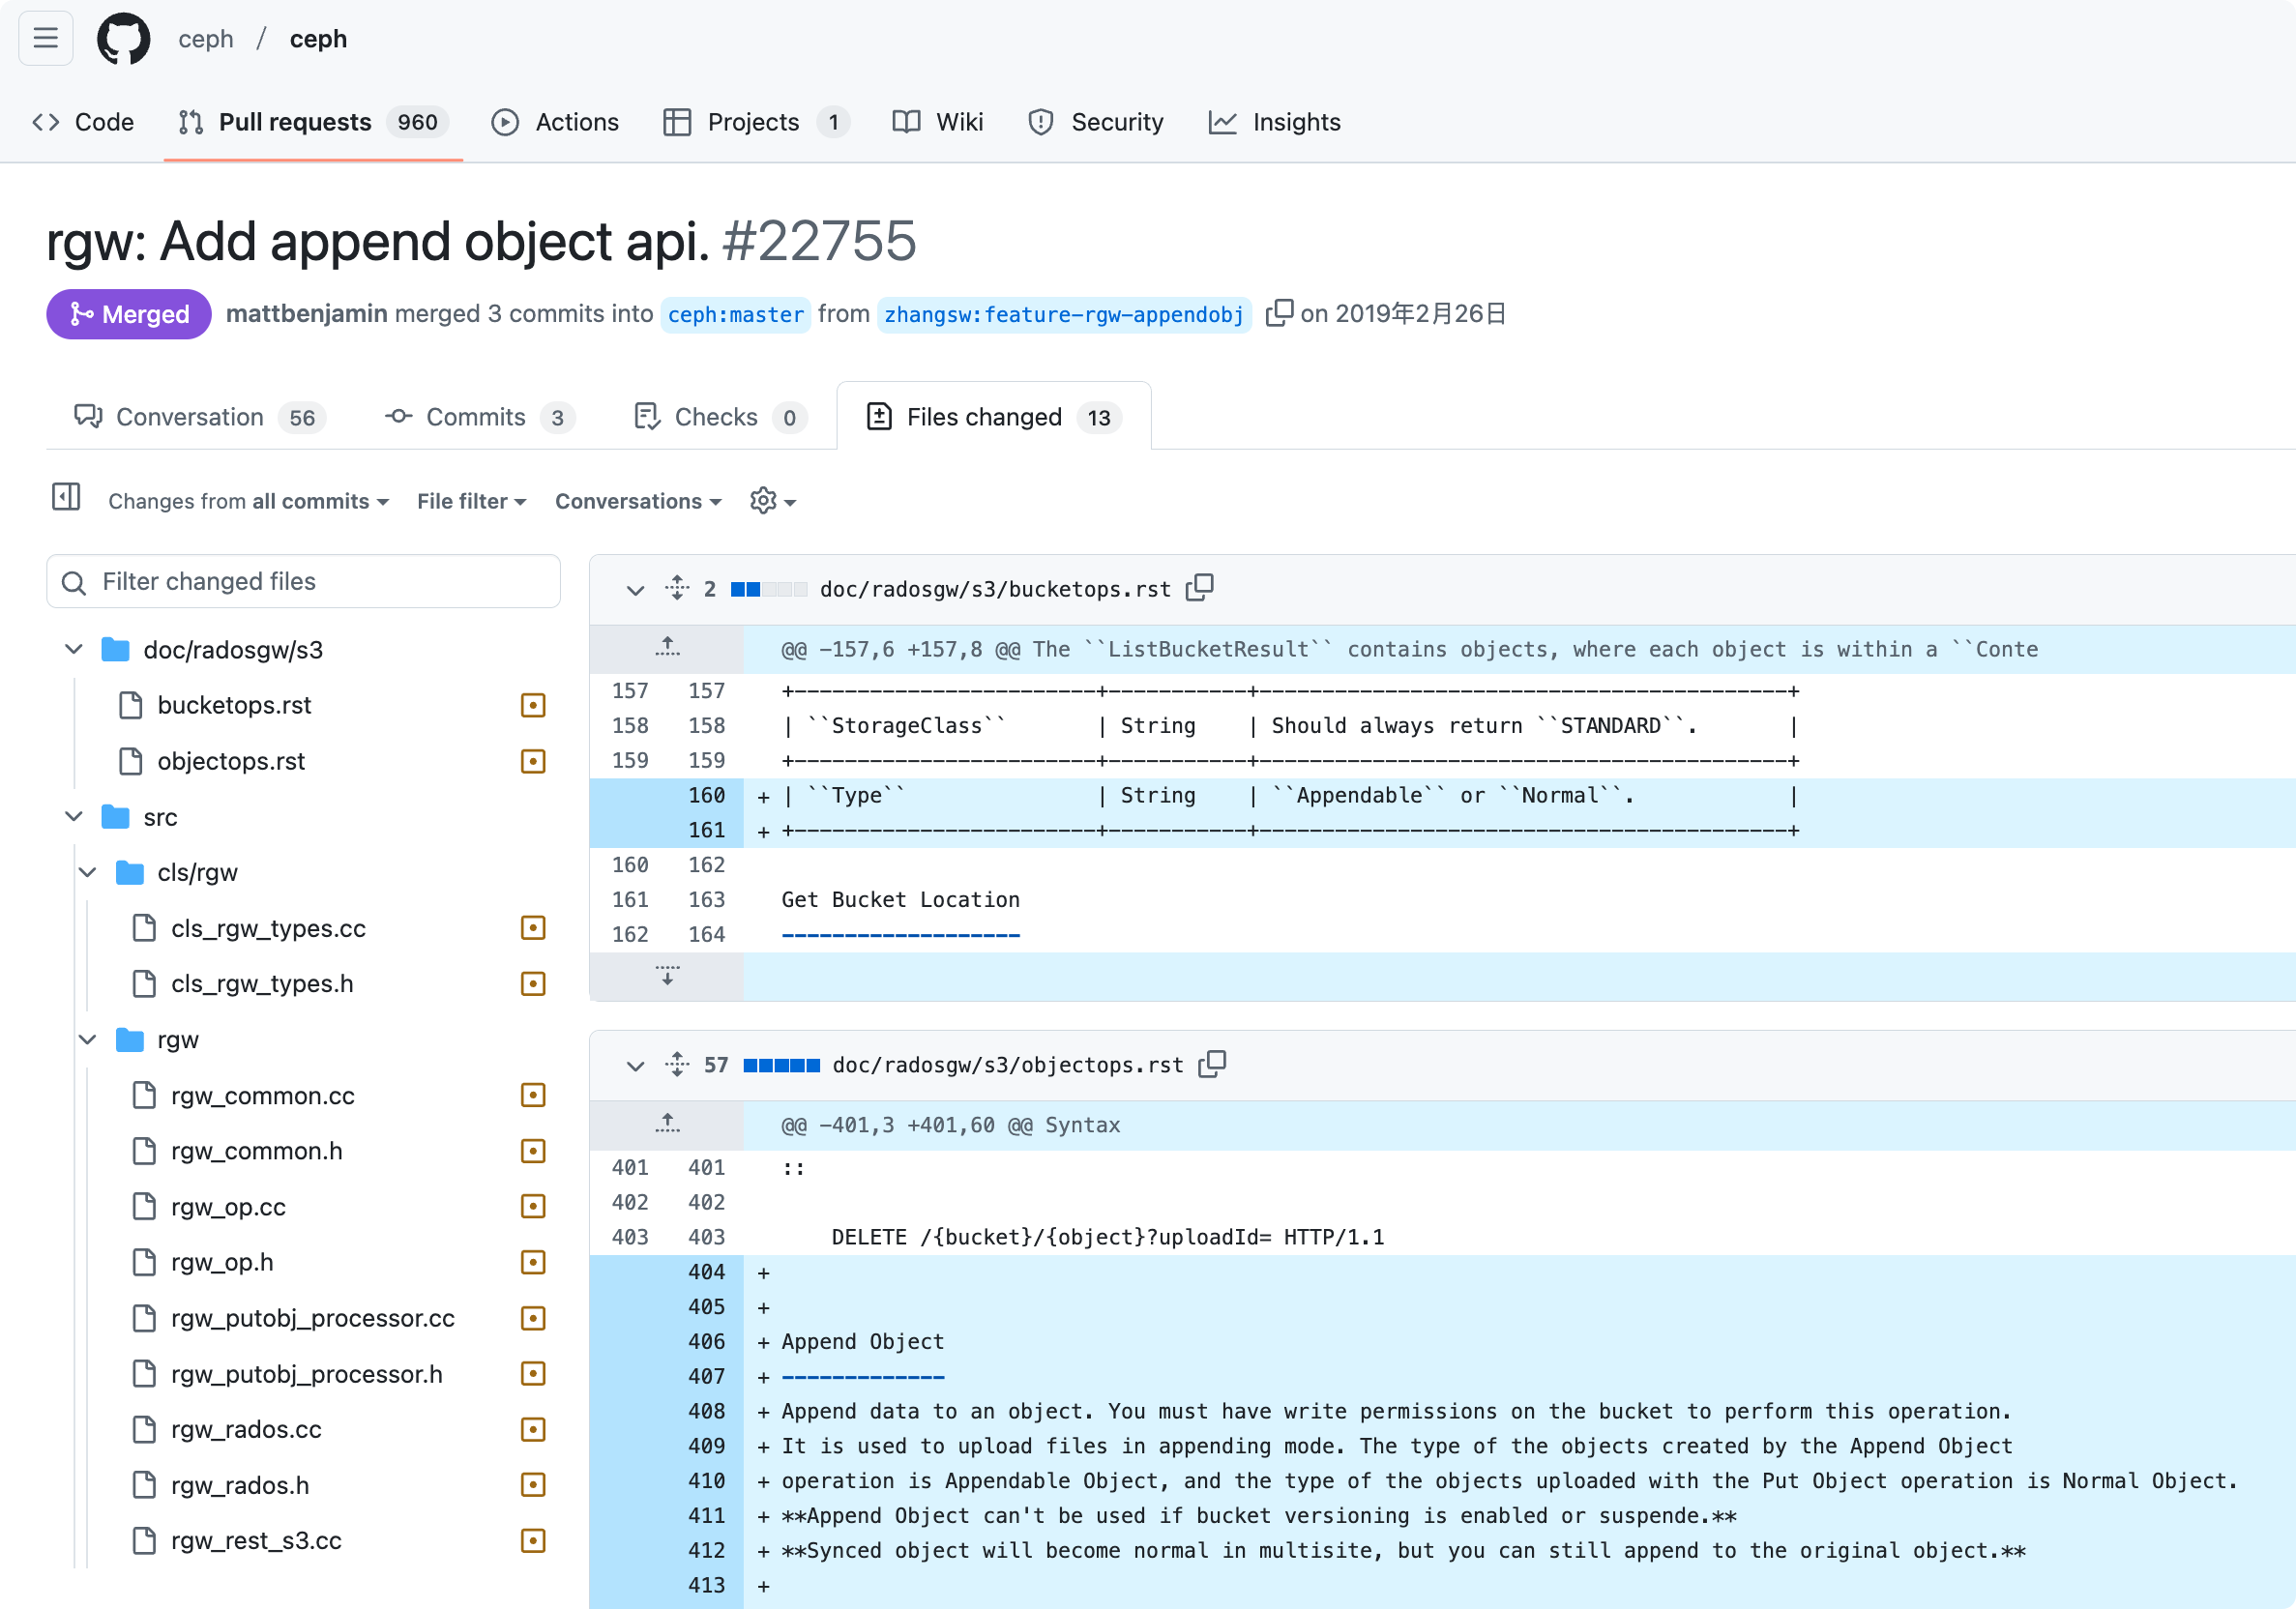
在2019年的2月就合入了这个功能了,也就是基本上2019年2月后面的主发行版本应该都是支持这个功能的
功能的验证 官方的说明
https://github.com/ceph/ceph/blob/main/examples/rgw/boto3/README.md
1
2
3
This directory contains examples on how to use AWS CLI/boto3 to exercise the RadosGW extensions to the S3 API. This is an extension to the [AWS SDK](https://github.com/boto/botocore/blob/develop/botocore/data/s3/2006-03-01/service-2.json).
这个写的是,这个目录下面有怎样使用aws的客户端和boto3的例子,以及相关的api的扩展,一般兼容性s3接口的做法是基于s3的原生标准接口再做扩展操作,这个里面就是相关的api的文件,我们需要把ceph官方提供的service-2.sdk-extras.json,添加到正在使用的boto3的sdk里面去,具体操作下面会写
确定boto3的位置 这个地方很容易出问题,因为可能环境里面装了不同版本的boto3,可能重新安装就按照了新的版本,也有可能通过不同的命令安装了不同的版本,我们需要确定好我们正在使用的boto3的库在哪里
安装boto3
1 [root@lab101 site-packages]
这里我指定了安装的版本,因为aws对这个botocore的版本有要求,然后隔一天boto重新安装就升级了,可以通过上面的命令来按照指定的版本即可
确定路径
1
2
3
4
5
6
7
[root@lab101 site-packages]"help" , "copyright" , "credits" or "license" for more information.print (botocore)'botocore' from '/usr/local/lib/python3.9/site-packages/botocore/__init__.py' >
可以看到路径在
1 /usr/local/lib/python3.9/site-packages/botocore
注意下我们的模型是在这个下面的botocore里面的
1
2
3
4
5
6
7
8
9
[root@lab101 2006-03-01]
查看这个文件
1
2
3
4
5
6
7
8
9
[root@lab101 2006-03-01]"version" : 1.0,"merge" : {"shapes" : {"Expires" :{"type" :"timestamp" }
可以看到这个文件是没有什么内容的,我们需要把ceph的扩展放到这个里面
这个去自己使用的ceph版本里面找,跨版本有可能出现当前版本没支持,后面版本支持的情况,所以尽量使用当前版本
1 https://github.com/ceph/ceph/blob/v15.2.17/examples/boto3/service-2.sdk-extras.json
比如上面这个是我要测试的版本的,下面是当前最新版本的
1 https://github.com/ceph/ceph/blob/main/examples/rgw/boto3/service-2.sdk-extras.json
可以看到路径发生了变化,把boto3的放到rgw下面去了,这个找下即可
1
2
3
[root@lab101 ~]cp : overwrite ‘/usr/local/lib/python3.9/site-packages/botocore/data/s3/2006-03-01/service-2.sdk-extras.json’? y
替换
1
2
3
4
5
6
7
8
9
10
[root@lab101 2006-03-01]"AppendPosition" : {"shape" :"AppendPosition" ,"Append" : {"shape" :"Append" ,"documentation" :"<p>Append Object</p>" ,"Append" : {"type" :"boolean" },"AppendPosition" :{"type" :"integer" },"AppendPosition" : {"shape" :"AppendPosition" ,
检查确认下相关的关键字已经放入了,上面的就是确认有了
验证追加写功能
https://github.com/ceph/ceph/blob/v15.2.17/examples/boto3/append_object.py
这个是ceph官方提供的例子
1
2
3
4
5
6
7
8
9
10
11
12
13
14
15
16
17
18
19
20
21
22
23
24
25
26
27
28
29
30
31
32
33
34
35
36
37
38
39
40
41
42
#!/usr/bin/python print (json.dumps(arg, indent=2))if len(sys.argv) != 3:print ('Usage: ' + sys.argv[0] + ' <bucket> <key>' )'http://127.0.0.1:8000' '0555b35654ad1656d804' 'h7GhxuBLTrlhVUyxSPUKUV8r/2EI4ngqJxD7iBdBYLhwluN30JaT3Q==' 's3' ,print ('deleting object first' )print ('appending at position 0' )'8letters' )'AppendPosition' ]print ('appending at position %d' % append_pos)'8letters' ))
可以看下大概的内容
先删除指定的名称的对象
然后在0的位置写入8letters字符
然后在获取返回的AppendPosition
基于AppendPosition写入下一个8letters字符
看下aws的官方的例子
1 s3.put_object(Bucket='amzn-s3-demo-bucket--use2-az2--x-s3' , Key='2024-11-05-sdk-test' , Body=b'123456789' , WriteOffsetBytes=9)
大部分是一样的,就是WriteOffsetBytes对应的是ceph的AppendPosition
修改成自己可以用的脚本
1
2
3
4
5
6
7
8
9
10
11
12
13
14
15
16
17
18
19
20
21
22
23
24
25
26
27
28
29
30
31
32
33
34
35
36
37
38
39
40
41
42
43
[root@lab101 ceph]print (json.dumps(arg, indent=2))if len(sys.argv) != 3:print ('Usage: ' + sys.argv[0] + ' <bucket> <key>' )'http://192.168.0.101:7481' 'test1' 'test1' 's3' ,print ('deleting object first' )print ('appending at position 0' )'8letters' )'AppendPosition' ]print ('appending at position %d' % append_pos)'8letters' ))
运行脚本
1
2
3
4
5
6
7
8
9
10
11
12
13
14
15
16
17
18
19
20
21
22
23
24
25
26
27
28
29
30
31
32
33
34
35
36
37
38
39
40
41
42
43
44
45
46
47
48
49
50
51
52
[root@lab101 ceph]"ResponseMetadata" : {"RequestId" : "tx000001eb3924743c3404f-00675ba47a-37bd-default" ,"HostId" : "" ,"HTTPStatusCode" : 204,"HTTPHeaders" : {"x-amz-request-id" : "tx000001eb3924743c3404f-00675ba47a-37bd-default" ,"date" : "Fri, 13 Dec 2024 03:05:30 GMT" "RetryAttempts" : 0"ResponseMetadata" : {"RequestId" : "tx00000952a1aea29f3ea2f-00675ba47a-37bd-default" ,"HostId" : "" ,"HTTPStatusCode" : 200,"HTTPHeaders" : {"content-length" : "0" ,"etag" : "\"4310bc7480e027b4b5aede530e4ee9df\"" ,"accept-ranges" : "bytes" ,"x-rgw-next-append-position" : "8" ,"x-amz-request-id" : "tx00000952a1aea29f3ea2f-00675ba47a-37bd-default" ,"date" : "Fri, 13 Dec 2024 03:05:30 GMT" "RetryAttempts" : 0"ETag" : "\"4310bc7480e027b4b5aede530e4ee9df\"" ,"AppendPosition" : 8"ResponseMetadata" : {"RequestId" : "tx00000bb44851eb1f0253d-00675ba47a-37bd-default" ,"HostId" : "" ,"HTTPStatusCode" : 200,"HTTPHeaders" : {"content-length" : "0" ,"etag" : "\"4310bc7480e027b4b5aede530e4ee9df\"" ,"accept-ranges" : "bytes" ,"x-rgw-next-append-position" : "16" ,"x-amz-request-id" : "tx00000bb44851eb1f0253d-00675ba47a-37bd-default" ,"date" : "Fri, 13 Dec 2024 03:05:30 GMT" "RetryAttempts" : 0"ETag" : "\"4310bc7480e027b4b5aede530e4ee9df\"" ,"AppendPosition" : 16
参数是一个bucket名,一个对象的名称
查看运行的效果
1
2
3
4
[root@lab101 ceph]
可以看到追加写的功能成功了,确实有16个字符了
上面的是使用的boto3的sdk做的python的测试用例,看下aws的怎样使用
aws的追加写方法 1 https://docs.aws.amazon.com/AmazonS3/latest/userguide/directory-buckets-objects-append.html
1 aws s3api put-object --bucket amzn-s3-demo-bucket--azid--x-s3 --key sampleinput/file001.bin --body bucket-seed/file001.bin --write-offset-bytes size-of-sampleinput/file001.bin
这个是aws这边的推荐的方法,这个里面有个write-offset-bytes的关键字,这个就是对象的偏移量
1
2
3
4
[root@lab101 2006-03-01]"WriteOffsetBytes" :{"shape" :"WriteOffsetBytes" ,"WriteOffsetBytes" :{
这个地方WriteOffsetBytes会在命令行这边解析为 –write-offset-bytes
这个是aws的这边的解析,在ceph这边是按AppendPosition和Append来解析的,那么我们可以尝试命令行用这个参数测试
1
2
3
4
5
6
7
[root@lab101 ~]"ETag" : "\"15fe514867dd5b4a1abf91ea35ff9e22\"" ,"AppendPosition" : 8
下载下来看看
1
2
3
4
[root@lab101 ceph]
再追加
1
2
3
4
5
[root@lab101 ~]"ETag" : "\"15fe514867dd5b4a1abf91ea35ff9e22\"" ,"AppendPosition" : 16
再下载
1
2
3
4
5
[root@lab101 ceph]
再测试
1
2
3
4
5
6
7
8
[root@lab101 ~]"ETag" : "\"15fe514867dd5b4a1abf91ea35ff9e22\"" ,"AppendPosition" : 24
可以看到,追加写的时候必须正确的指定已经存在的对象的大小位置,也就是偏移量,从哪里开始追加写
返回的位置就是最后的对象的大小
1
2
[root@lab101 ceph]
可以看到追加写成功了
restapi追加写的功能 下面是正常的上传的代码,不是追加写的功能
1
2
3
4
5
6
7
8
9
10
11
12
13
14
15
16
17
18
19
20
21
22
23
24
25
26
27
28
29
30
31
32
33
34
35
36
37
38
39
40
41
42
43
44
45
46
47
48
49
50
51
52
53
54
55
56
57
58
59
60
61
[root@lab101 ceph]base64 "test1" "test1" "http://192.168.0.101:7481" "testbucket" "testrest.txt" date , secret_key):"{method}\n\n{content_type}\n{date}\n/{bucket}/{object_key}" print ("String to sign:" , string_to_sign) 'utf-8' ), string_to_sign.encode('utf-8' ), hashlib.sha1).digest()return base64.b64encode(signature).decode('utf-8' )"rb" ) as f:"application/octet-stream" date = datetime.datetime.utcnow().strftime("%a, %d %b %Y %H:%M:%S GMT" )"PUT" ,date =date ,"Content-Type" : content_type,"Date" : date ,"Authorization" : f"AWS {ACCESS_KEY}:{signature}" "{RGW_ENDPOINT}/{BUCKET_NAME}/{OBJECT_KEY}" print ("Request URL:" , url) print ("Headers:" , headers) if response.status_code == 200:print ("Upload successful!" )else :print (f"Upload failed! Status code: {response.status_code}, Response: {response.text}" )if __name__ == "__main__" :"zp.txt" )
我们再来一个追加写的restapi
1
2
3
4
5
6
7
8
9
10
11
12
13
14
15
16
17
18
19
20
21
22
23
24
25
26
27
28
29
30
31
32
33
34
35
36
37
38
39
40
41
42
43
44
45
46
47
48
49
50
51
52
53
54
55
56
57
58
59
60
61
62
63
64
65
66
67
68
69
70
[root@lab101 ceph]base64 "test1" "test1" "http://192.168.0.101:7481" "testbucket" date , secret_key):"{method}\n\n{content_type}\n{date}\n/{bucket}/{object_key}" print ("String to sign:" , string_to_sign) 'utf-8' ), string_to_sign.encode('utf-8' ), hashlib.sha1).digest()return base64.b64encode(signature).decode('utf-8' )"rb" ) as f:"application/octet-stream" date = datetime.datetime.utcnow().strftime("%a, %d %b %Y %H:%M:%S GMT" )"PUT" ,date =date ,"Content-Type" : content_type,"Date" : date ,"Authorization" : f"AWS {ACCESS_KEY}:{signature}" "{RGW_ENDPOINT}/{BUCKET_NAME}/{object_key}?position={position}&append=true" print ("Request URL:" , url) print ("Headers:" , headers) if response.status_code == 200:print ("Append successful!" )print ("Response headers:" , response.headers)else :print (f"Append failed! Status code: {response.status_code}, Response: {response.text}" )if __name__ == "__main__" :if len(sys.argv) != 4:print ("Usage: python3 test4.py <object_key> <file_path> <position>" )
可以看到签名的地方并没有改变,改变的就是请求的questsring发生了变化
看下运行效果
1
2
3
4
5
6
7
8
9
10
[root@lab101 ceph]true 'Content-Type' : 'application/octet-stream' , 'Date' : 'Fri, 13 Dec 2024 07:13:33 GMT' , 'Authorization' : 'AWS test1:3J3okCbKD2WVsNpfngjMPqBmvVU=' }'Content-Length' : '0' , 'ETag' : '"0a2806dcc91865a811d19150084f6de7"' , 'Accept-Ranges' : 'bytes' , 'x-rgw-next-append-position' : '16' , 'x-amz-request-id' : 'tx00000ec3108225d59c5e1-00675bde9d-37bd-default' , 'Date' : 'Fri, 13 Dec 2024 07:13:33 GMT' , 'Connection' : 'Keep-Alive' }
可以看到返回的x-rgw-next-append-position为16,也就是下个请求应该从16开始
查看文件大小
1
2
[root@lab101 site-packages]
再次请求
1
2
3
4
5
6
7
8
9
10
[root@lab101 ceph]true 'Content-Type' : 'application/octet-stream' , 'Date' : 'Fri, 13 Dec 2024 07:14:29 GMT' , 'Authorization' : 'AWS test1:PsYEAg3YnDb8PVBvRWSKL7nPhy0=' }'Content-Length' : '0' , 'ETag' : '"0a2806dcc91865a811d19150084f6de7"' , 'Accept-Ranges' : 'bytes' , 'x-rgw-next-append-position' : '32' , 'x-amz-request-id' : 'tx00000cbe7cf038ff40327-00675bded5-37bd-default' , 'Date' : 'Fri, 13 Dec 2024 07:14:29 GMT' , 'Connection' : 'Keep-Alive' }
再次查看
1
2
[root@lab101 site-packages]
可以看到文件追加写进去了
上面的例子是用的v2认证做的例子,v2认证比v4要简单一些
总结 本篇介绍了ceph这边的rgw的追加写的功能验证,可以看到跟aws类似,关键字做一点改变即可,本篇从三个工具讲述了ceph里面的追加写的功能,Python的boto的sdk的方法,aws的工具的方法,以及restapi的方法,从三个地方讲述了怎样发起追加写的请求,整体上还是比较简单就是对着指定的位置发起请求即可,就是请求的时候带上一个偏移量


